Elderflower Champagne Recipe
It's the time of year when the Elderflowers are coming into flower. This weekend we were able to pick quite a few locally. So we dug out our trusty Elderflower Champagne Recipe and got our first batch started!
Of course technically this is not really 'Champagne', it is sparkling wine. But traditionally that's what people call it, and that's what it's known as in our house.
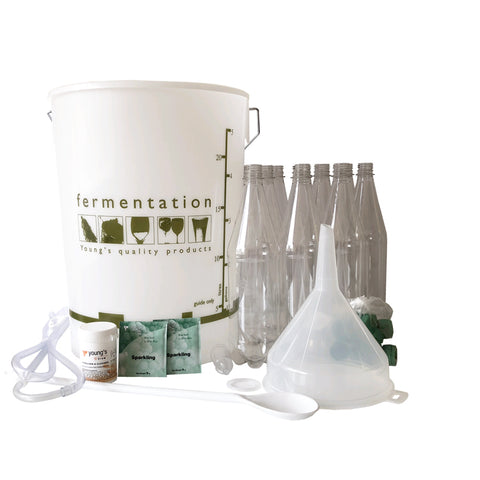
If you've never brewed before and have no equipment, the good news is we usually have Elderflower Champagne Kits in stock which include all the equipment plus the yeast and a steriliser. There are two versions, the standard Elderflower Champagne Kit and a deluxe Elderflower Champagne kit which includes a hydrometer and bottles. You just need to add ingredients. Young's have kindly supplied the following recipe to go with the kit.

However if you are reading this in 2020, you may struggle to find an Elderflower Champagne Starter Kit anywhere because nobody has any. Our suppliers have all had issues in the current global pandemic. So I have broken down what is in the kit with links to where you will find the parts.
The following is what the kit would include. Unfortunately buying parts separately like this with all the postage costs will make this more expensive than buying one kit in one place. Hopefully you have a funnel and spoon in your kitchen already, you only need 1 sachet of yeast per batch (though the kit would have included 2) and the kit would include 10 bottles and I can only find a listing for 24. Nevertheless, hopefully you'll find the following useful if you are looking for the kit and you cannot find one anywhere:
* 100grm Steriliser (us)* 25 Litre Fermentation Vessel / Drilled Lid & Grommet (Ebay) https://ebay.to/3c4ycni https://www.almostoffgrid.com/products/sparkling-wine-yeast-5g?_pos=1&_sid=8f2a95e6f&_ss=r
* Funnel (Ebay) https://ebay.to/36FMPfB
* Plastic Spoon (Ebay) https://ebay.to/2X6tgtK
* Telescopic Syphon (Ebay) https://ebay.to/2ZESroO
* 10 x 1L PET Bottles (this is for 24 - Ebay) https://ebay.to/2M505RE* The recipe below.
Elderflower Champagne Recipe

This recipe makes 10 Litres of Elderflower Champagne. Fermenting time: Approx 1-2 weeks. Maturing Time: 4 weeks. The bottles can be left longer so that the elderflower flavours develop.
Ingredients
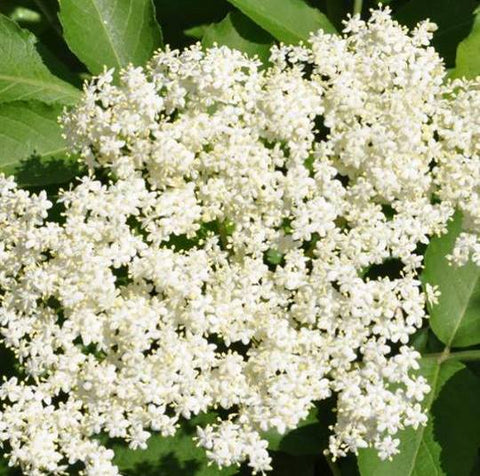
6-8 large Elderflower heads (make sure that they are fully open). The more elderflowers you use, the more elderflower flavour you'll get in the end product.
1kg sugar
2 x Lemons
5 x Tablespoons of White Wine Vinegar
10 Litres of cold water
1 x sachet of Sparkling Wine Yeast (sufficient for up to 25 litres).
This recipe is based on making 10 x 1Litres Bottles. To make larger batches, increase the quantities in proportion.
Method
Before starting make sure all your equipment is sterilised using your steriliser of choice (or that included in your kit), following the instructions on the label.
1. Add 10 Litres of warm water to the Fermentation Vessel and add the 1kg of Sugar and the Vinegar. Stir to dissolve the sugar.
2. Wash the lemons and remove the rind. Squeeze the lemons and put the juice into the Fermenting Vessel along with the lemon rind.
3. Remove any insects, leaves or other unwanted objects from the Elderflowers. Then remove the elderflowers from their stems, leaving as little green as possible (the green stems make elderflower champagne bitter). The easiest way to do this is either with a fork or a pair of scissors.
4. Add the Elderflowers to the water, being careful not to crush the flower heads.
5. Sprinkle a sachet of Yeast on the surface of the liquid. Stir carefully.
6. Put the lid on the Fermentation Vessel with the Airlock inserted in the Black Grommet on the lid. Half fill the Airlock chamber with water.
7. Leave to stand for approx 5-7 days or until the majority of the bubbling and fizzing has ceased. Each day check the contents of the bucket, you'll probably find the flowers floating on the top mixed in with bits of yeast. Be sure to gently stir that back into the liquid with a sterilised spoon and then quickly replace the lid, ensuring it's properly closed.
8. Sterilise the bottles prior to using with the Steriliser.
9. Place your fermenter higher than the bottles. Use the Syphon to transfer the mixture through the funnel / mini strainer into bottles. Take care not to disturb the sediment in the Fermentation Vessel and try to avoid transferring any debris. The less sediment you pick up, the clearer the end result will be.
10. Fill the bottles to approximately 11/2” Inch from the top of the bottle, placing the caps on carefully. Store somewhere cool.
What happens next?
As the weeks go by, you can test the progress of the secondary fermentation in the bottle(s) by trying to squeeze the bottle - it should be hard to the touch.
Make sure you store your bottles somewhere cool and check them regularly. If any of the bottles look very close to exploding (!), 'burp' the top to release some of the pressure.
After four weeks your Elderflower Champagne is ready to drink. The taste does improve with time and can be left for a year or more.
Open bottles carefully to avoid the contents spraying out. It is advisable to chill your Elderflower champagne in the fridge before drinking. Enjoy !
[This post contains links to our webshop and/or affiliate links to other shops. If you click on them, I may make a small commission at no extra cost to you. Find our disclosure policy here.]

Looks delicious. I make elderflower mead once. It was an acquired taste. Once I acquired another glass it got tastier lol
I’ve only ever used sugar Susan, seems a bit of a waste to use brewing sugar in elderflower champagne really. Would be interested to hear how it turned out though, and whether there’s any difference. Might have to have a go…
Hi – what is the best sugar to use? Brewers or normal?
Ok great, that does help, I’ll try not to fuss too much!
Hello! Well, I believe you’re using the PET bottles, as we are. If they were glass with a flip top, I’d be more concerned about burping them regularly. But with PET, I try not to do it too much because letting all those bubbles out all the time seems a bit of a shame! Plus the PET gives you clear signs. If/when your bottles start distorting because the pressure has built up a little too much, that’s the time. We’ve had our first batch bottled in PET for 2 weeks and we’re almost at that point but are holding off. Hope that helps